Examination order
This post is also available on:
![]()
To send an examination order, you must make the following settings:
- Create the laboratory as a recipient (for e-mail dispatch)
- Create a data communication recient (laboratory) for the examination order
- Presence of an active online client for data export
- Create a veterinarian with number (customer number) to receive the results
Note: all fields marked in green are mandatory
- Open
 capture animal >
  Further (…) >
  Examination order
- Click on
 New order

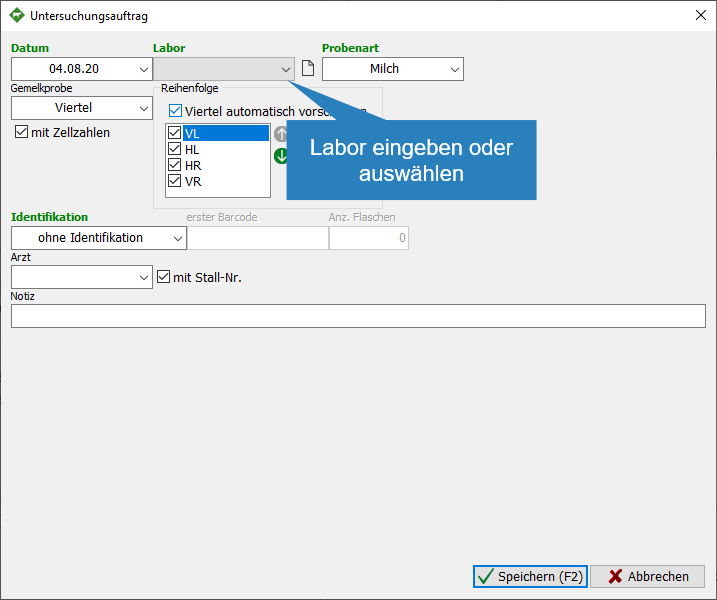
Step 1: Create an examination order (using quarter milking samples, for example)
- Enter or select date

- Select a lab from the drop-down list or click by a receiver for notifications (new laboratory), the receiver can also be used separately under
 organization >
  Settings > Keys > Recipients for Messages be set up
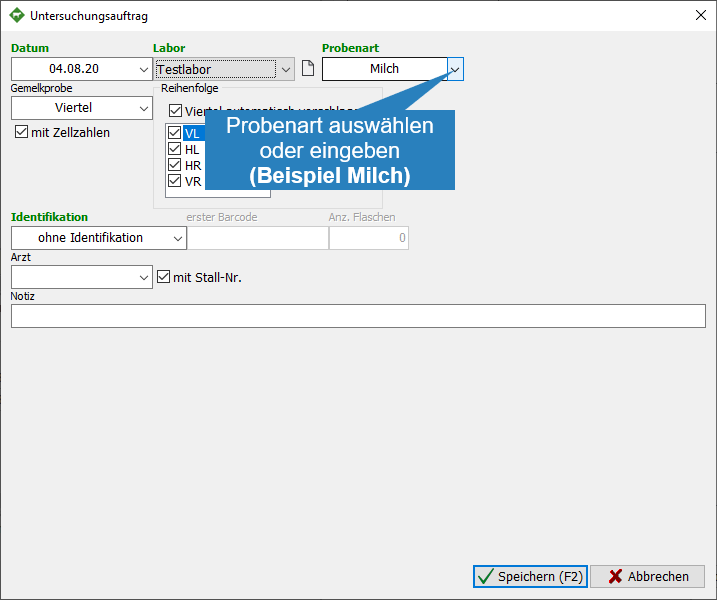
- Select the sample type (example: milk)
- M | Milk
- B | Blood
- D | Feces
- U | Urea
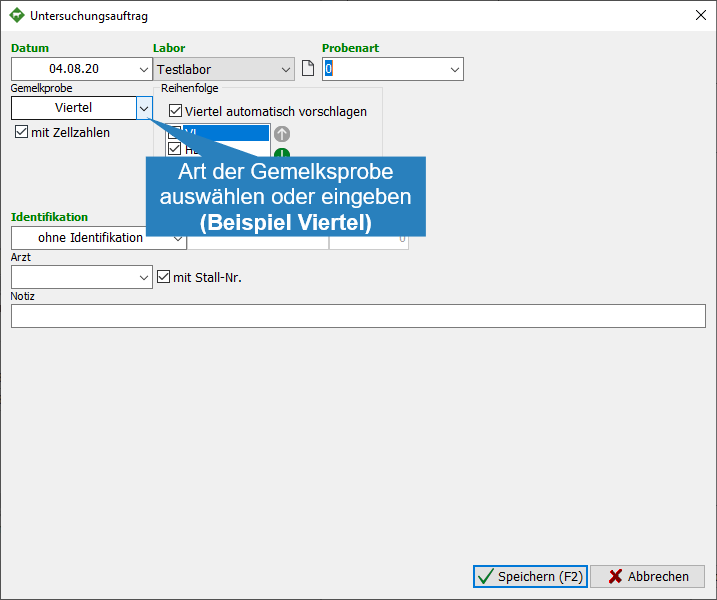
- Select the type of milksample via drop-down list (example: Quarter)
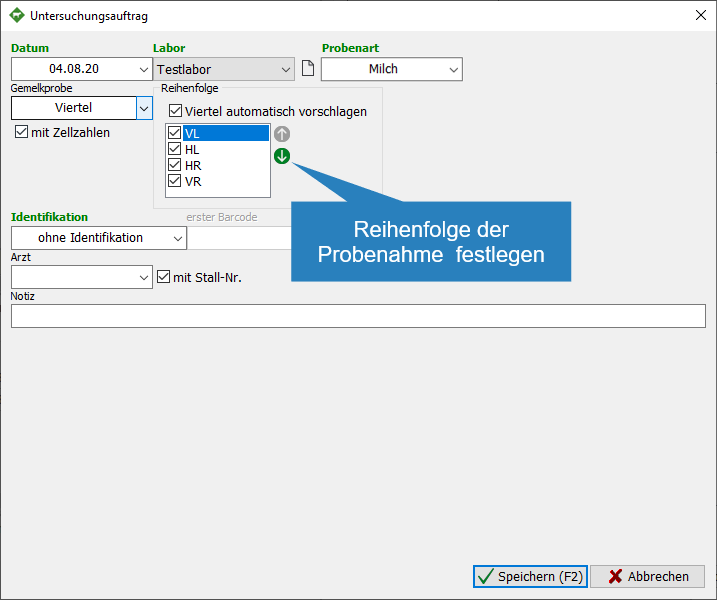
- Set the order of the sample name
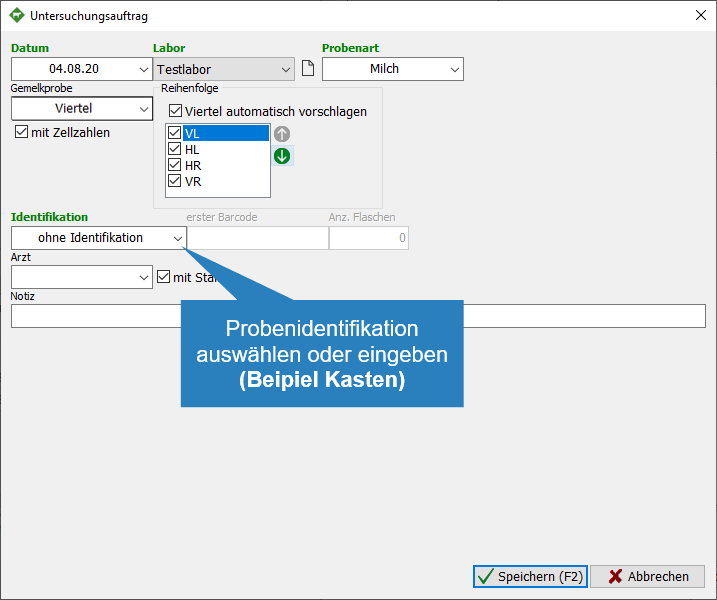
- Choose the type of sample identification
- B | Barcode
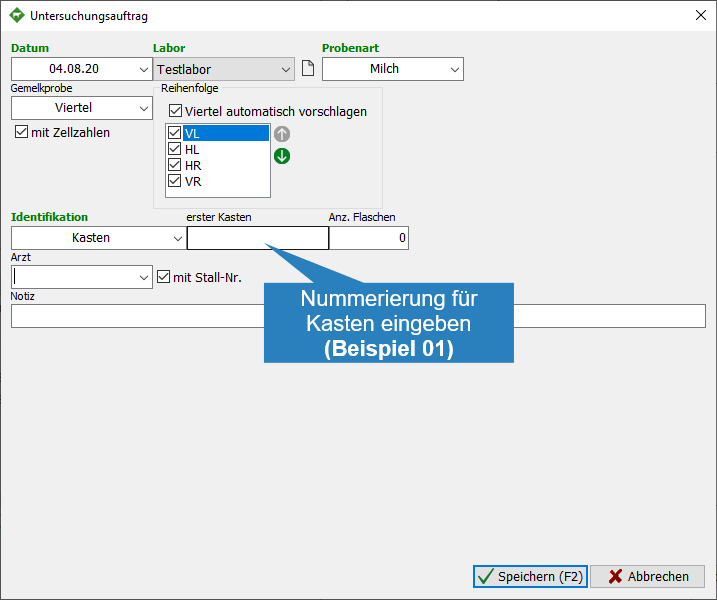
- X | Box
- C | Box with checksum
- NoIdent | No identification
- Enter the appropriate name for the box and enter the number of bottles
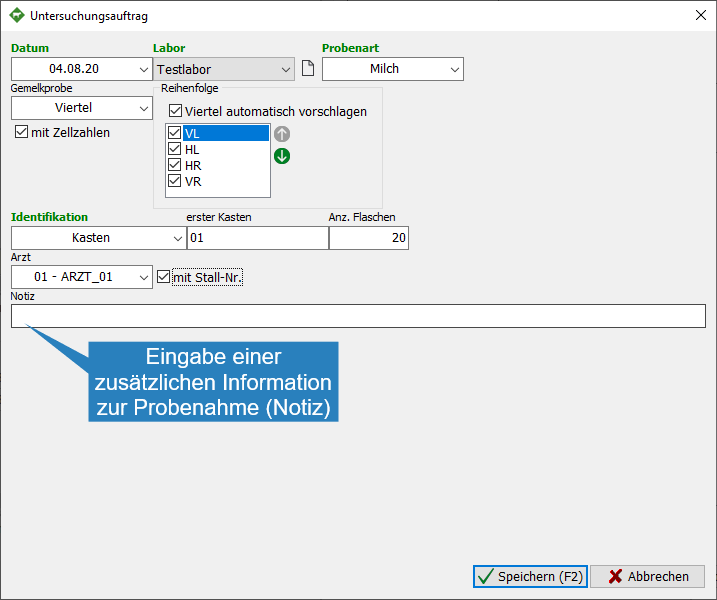
- Capture the sampler. The veterinarian needs the registered number (customer number) to receive the results directly from the laboratory.

- optional: Enter additional information as a note, this note is for the farmer only and will not be transmitted to the laboratory
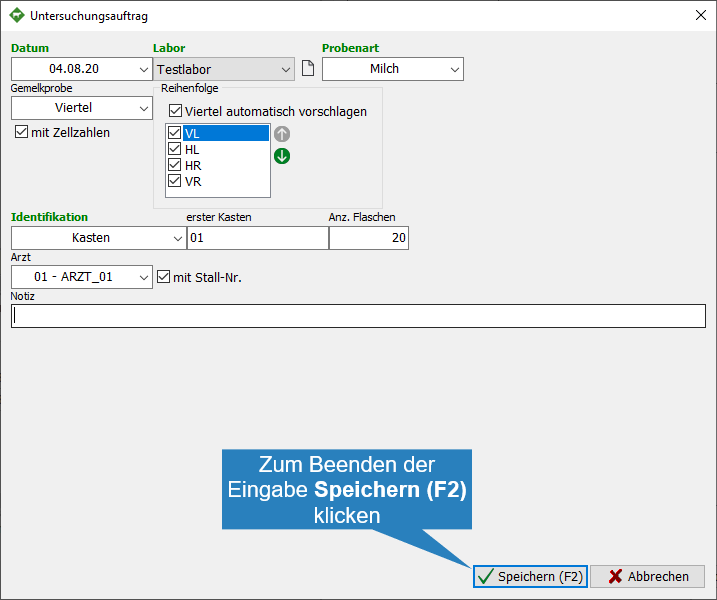
- Click Save
 to create the order
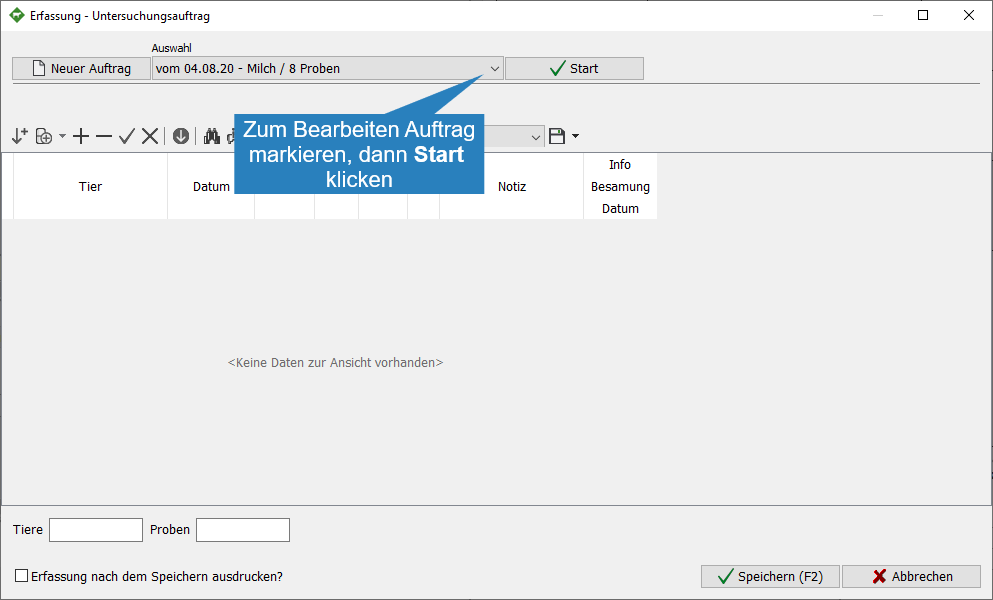
Step 2: Edit job, add animals
- Open Capture animal > Further (…) > Investigation Order
- Mark a job for editing under Selection, and then click
 Start
Start
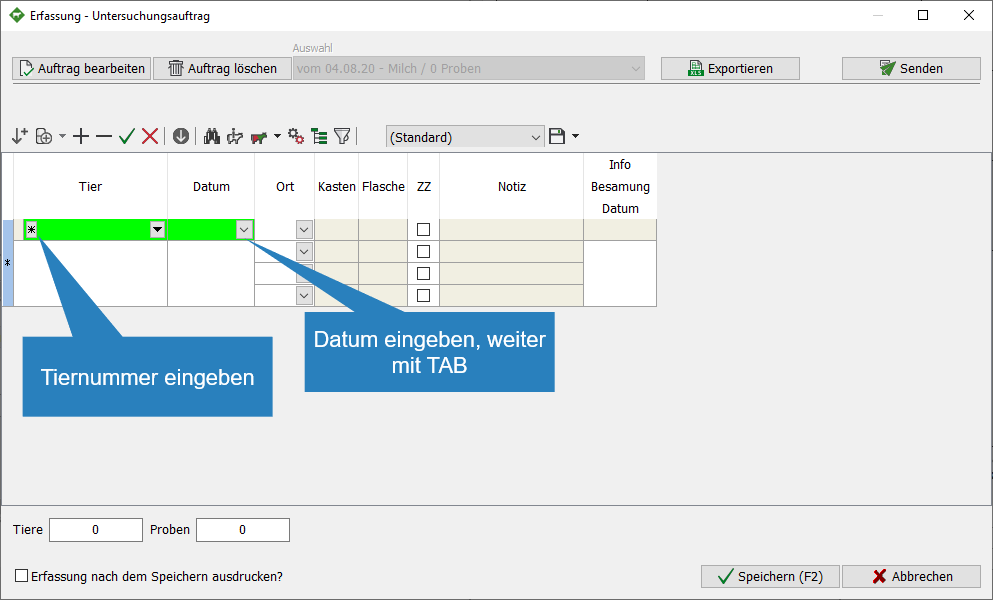
- Enter the animal number and enter or select a date
- The optional note is transmitted to the laboratory, e.B PCR test
- To record additional animals, continue as 14.
- to edit the order, click
 Edit Order
 - to delete the current order, click
 Delete Order
 - To export the data in csv format, click
 Export
- for the examination job “Blood” in HIT select Save ear numbers as CSV file
- To save the order, click Save
- to edit the order, click
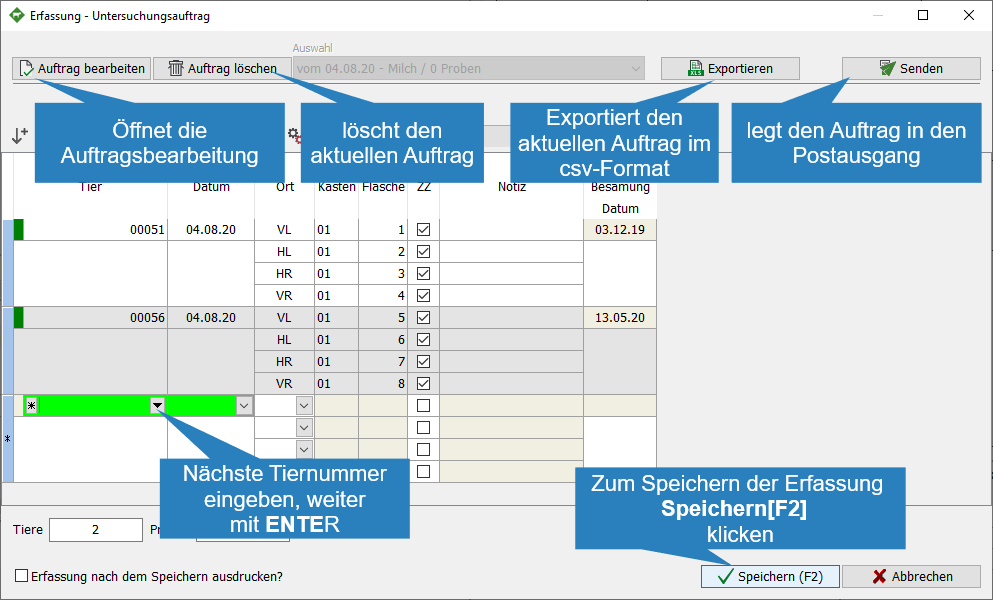
- To send the order, click
 Send
Send
 | Add the animal again (inactive)
 | Add line
 | Delete line
| Confirm 
 | Cancel
  | only with active line that is not yet plausible
 | copy entry of all remaining animals
 | Search for animal
 | Info animal
 | Context menu capture
- Movement
- Fertility
- Further (…)
- Technology
- Add to the work list
| Settings | Opens context menu settings
- User-defined characteristics
- Animal identifcation
- Edit print list
 | Set display | Columns can be added individually, sequence can be changed with drag’n’drop, then save, possibly under a separate (new) name
 | Filters | all animals are listed, if you remove the check mark in front of the animal, it is still displayed, by clicking on
  the filter becomes active, animals without check marks are hidden
![]() | Name of the current display (displayed columns and their order), as many ads can be saved as you like
| Name of the current display (displayed columns and their order), as many ads can be saved as you like
 | Save display under current name / Save display as / Delete display