Embryo management
This post is also available on:
![]()
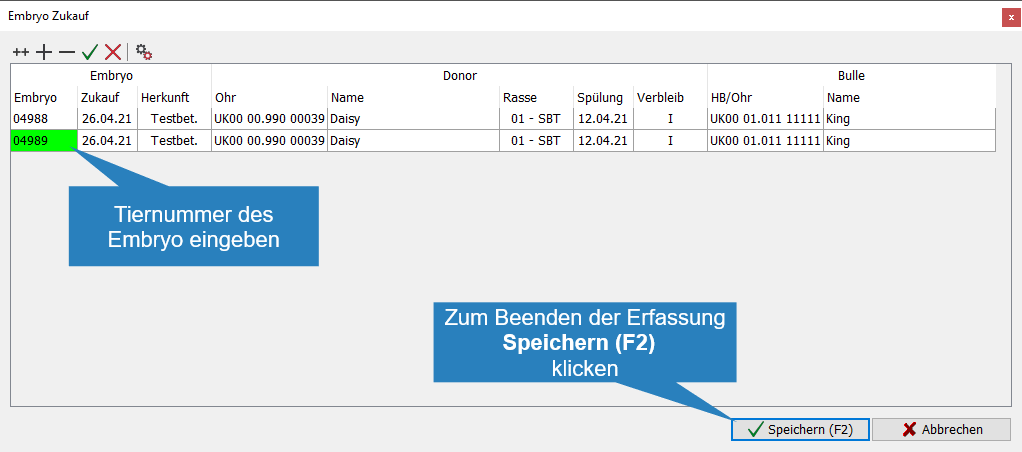
1. Capture of purchased embryos
- Open Capture animal >

 Other >
  administration embryos
 - Click
 to capture an embryo
- Assign an animal number for the embryo
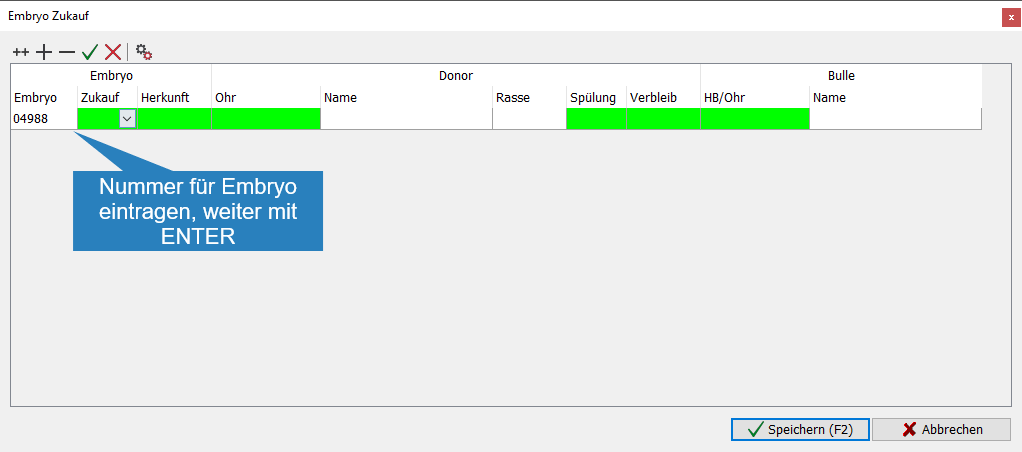
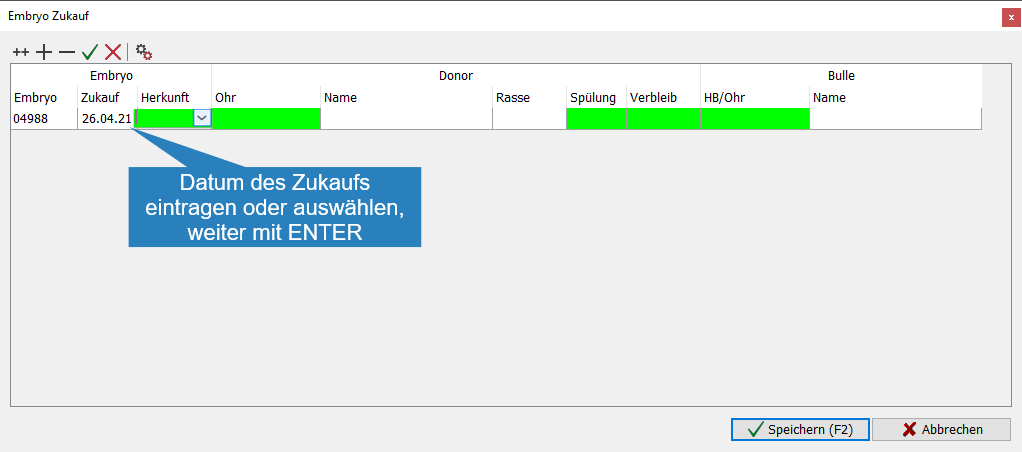
- Enter the purchase date, or choose to continue with

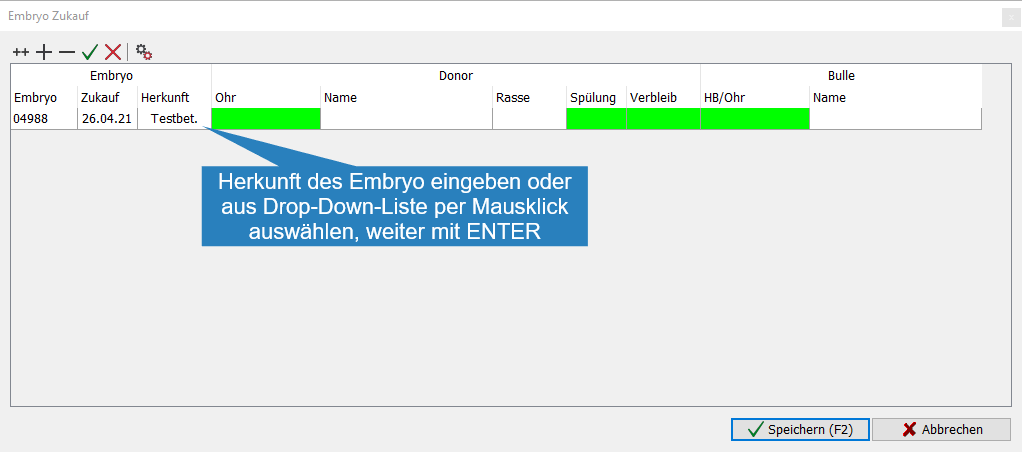
- Enter the origin of the embryo or select from the drop-down list. To do this, the seller must be created or become a recipient under
 Settings > Keys > Recipient
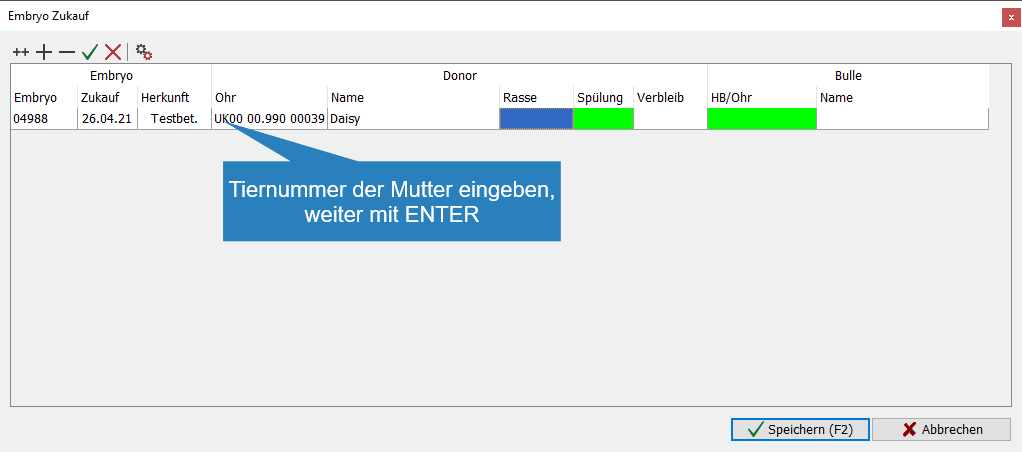
- Enter the mother’s ear number
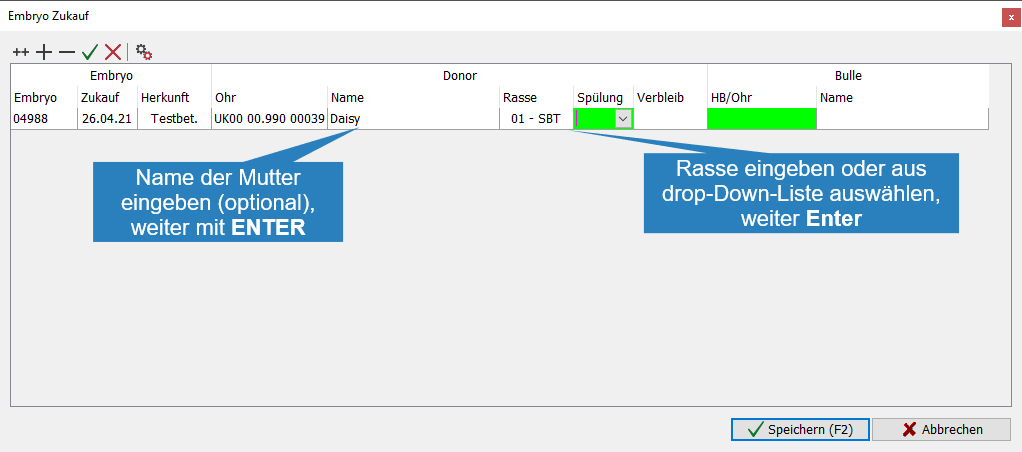
- Enter the name of the mother, this input is optional
- Enter the mother’s breed or select from the drop-down list, continue with
- Enter the date of flushing or select to continue with
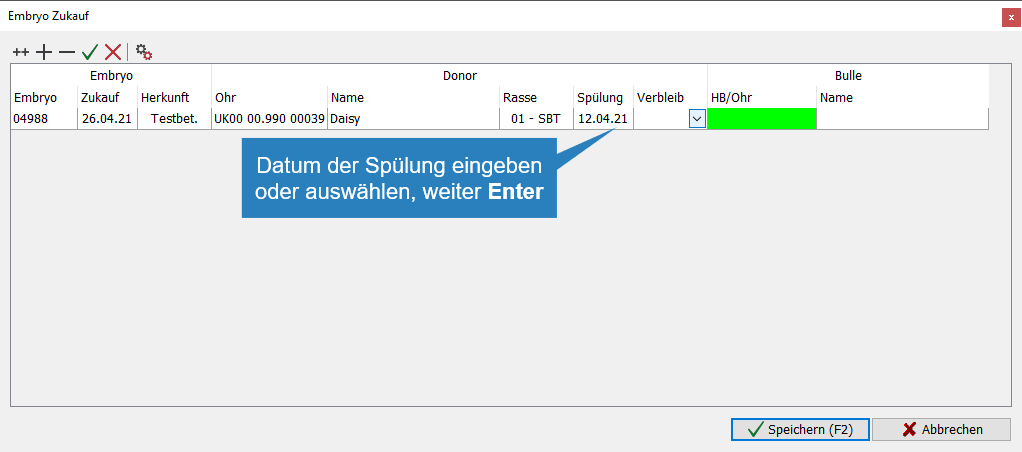
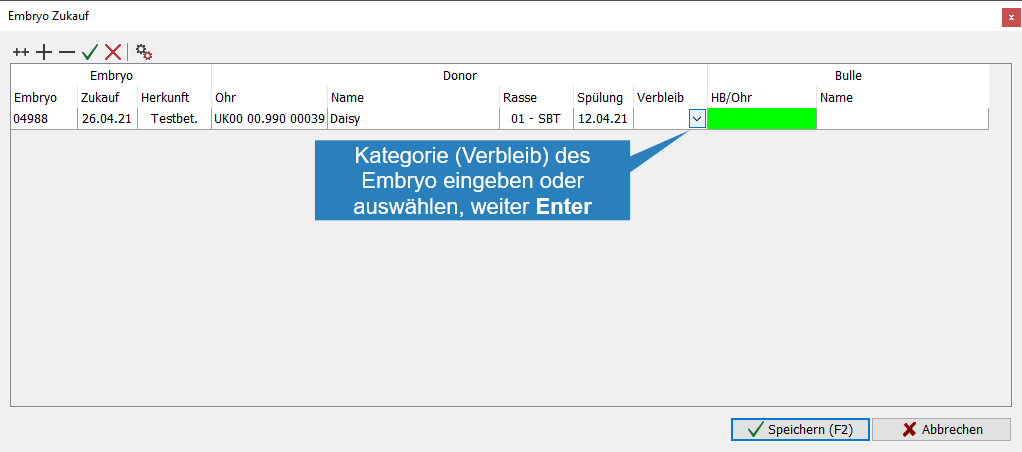
- Select the whereabouts of the embryo from the drop-down list, continue with
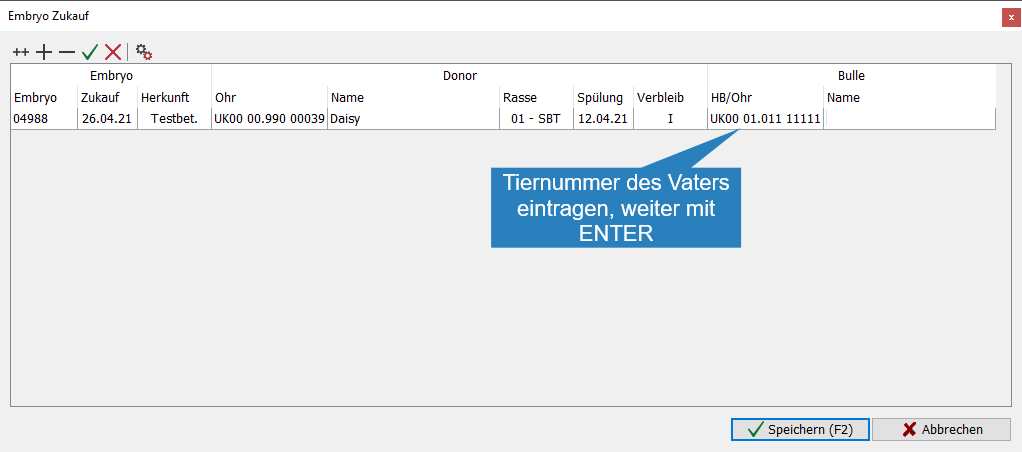
- Enter the father’s ear number
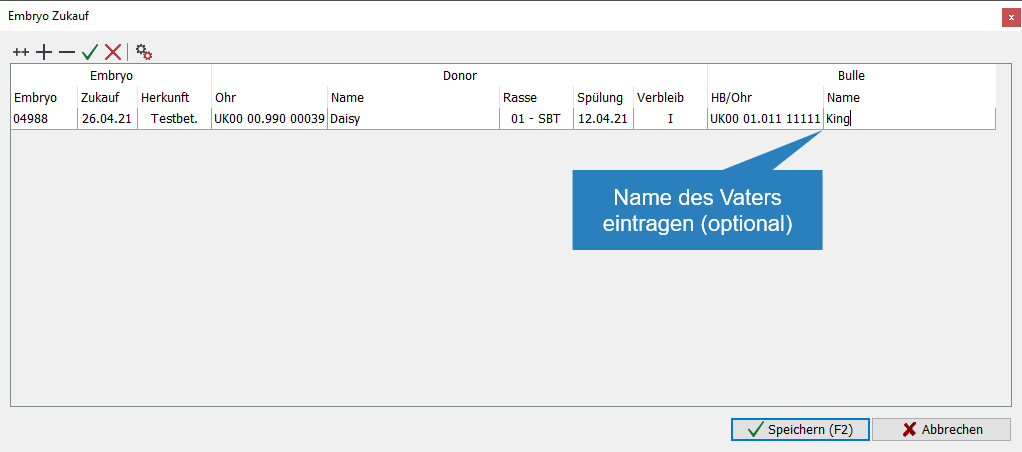
- Enter the father’s name (optional)
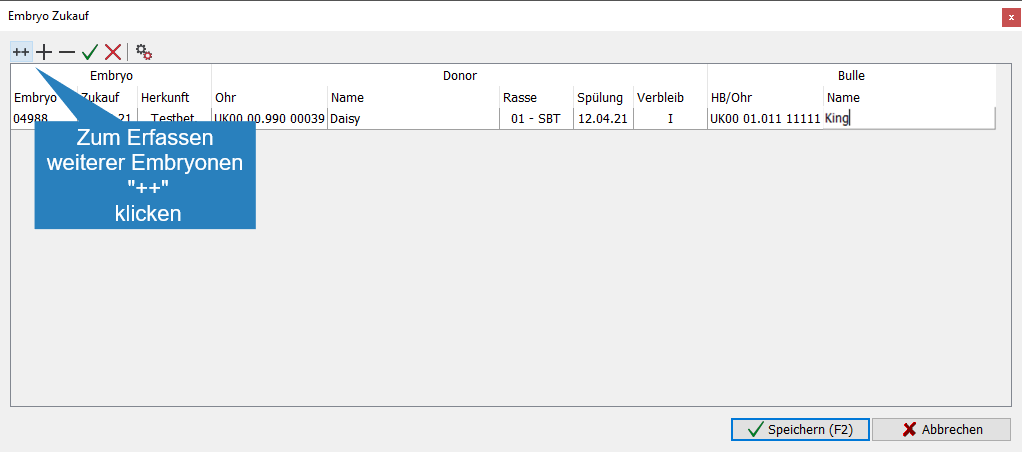
- To capture more embryos from a
 flush, click to capture an embryo from another flush, continue as point 2
- To save the captured embryos, click
 Save
Save
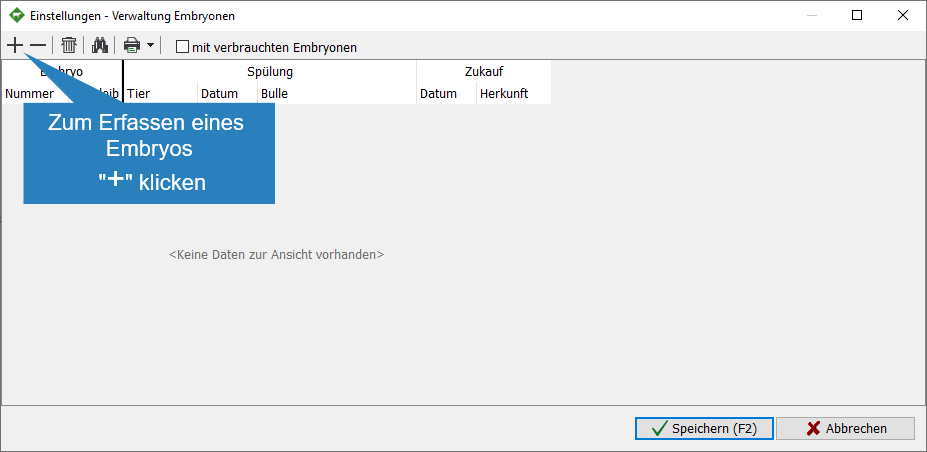
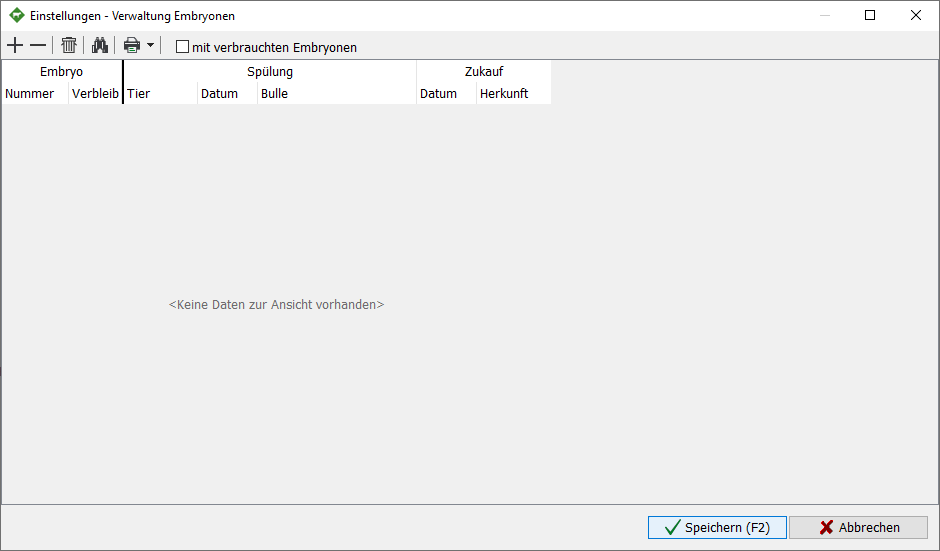
2. Management of existing embryos
- Open Capture animal > Other > administration embryos
- For the capture (purchase) of new embryos continue as described under 2.
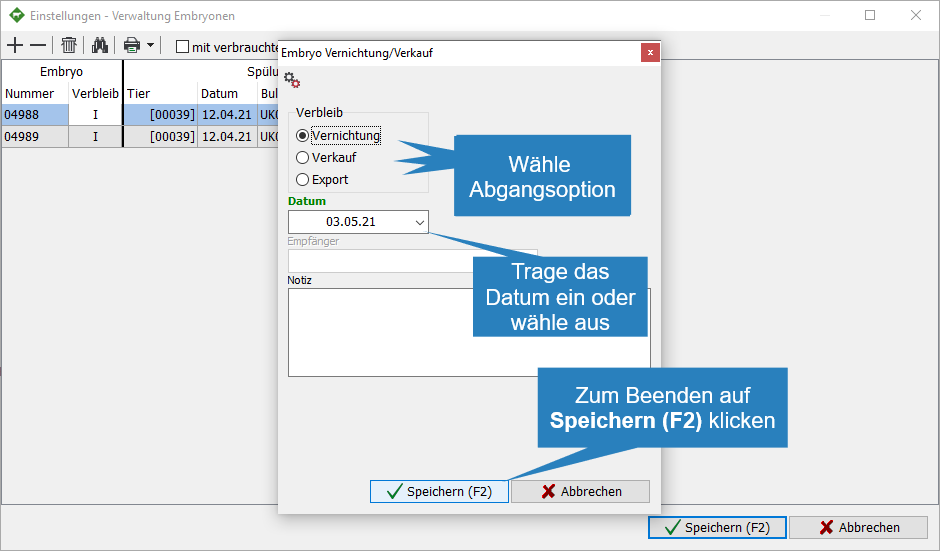
- To delete an existing embryo (loss) or record its departure (example: sale), mark the embryo and click

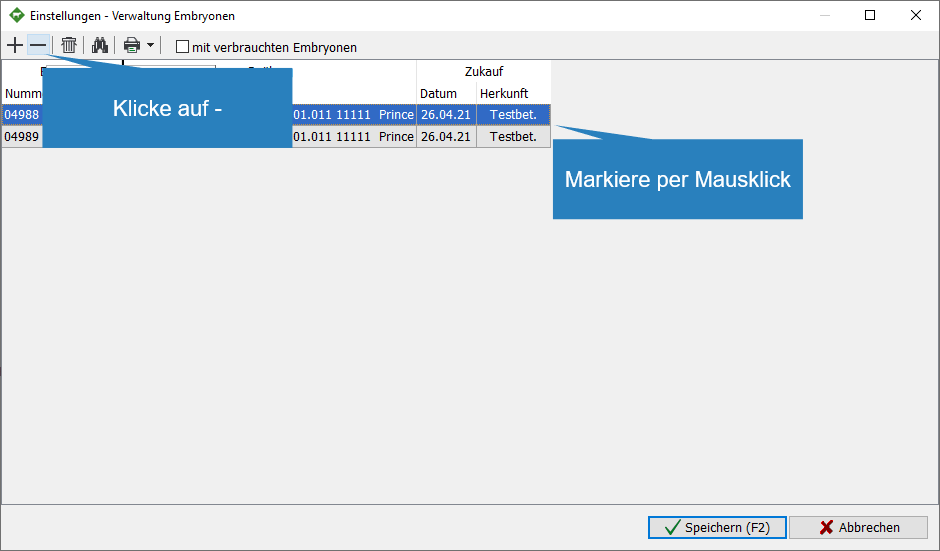
- Choose an exit option
- Annihilation
- Sale
- Export
- Enter the leaving date or select
- To save the exit, click Save
- To save the capture (deletion), click Save