Marking groups
This post is also available on:
![]()
1. Set up marking groups
- Open
 Settings > Keys > Marker Groups
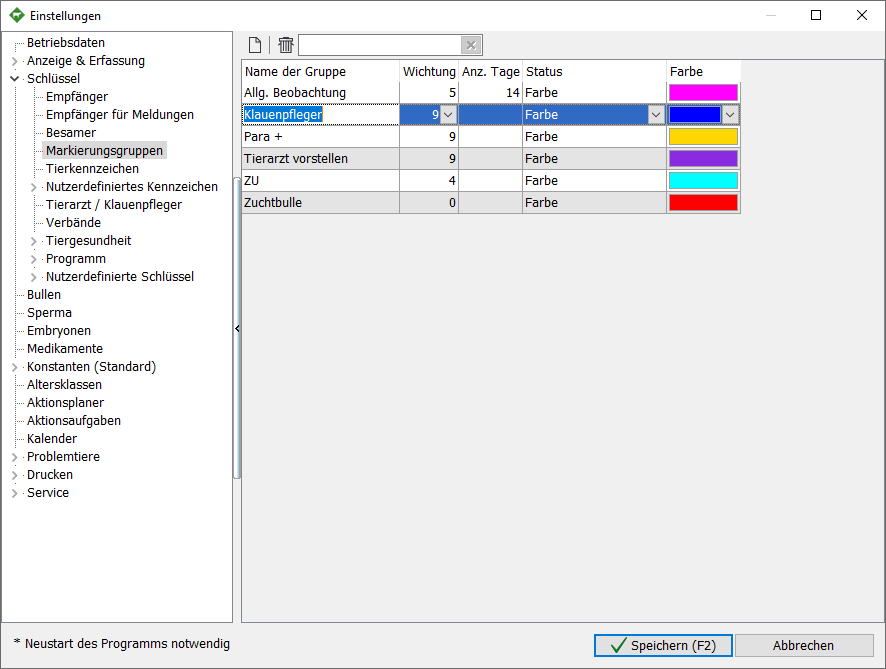
| the name of the group names the marking group and is freely selectable
Weighting | Sets the priority (order in which the marker is displayed) for multiple color markers of an animal
Number of days | determines the duration of the stay in the marking group; after the set time has elapsed, the animals are deleted from the marking group
Status | a color can be assigned to the selection group. To color the animals, the status “COLOR” must be set
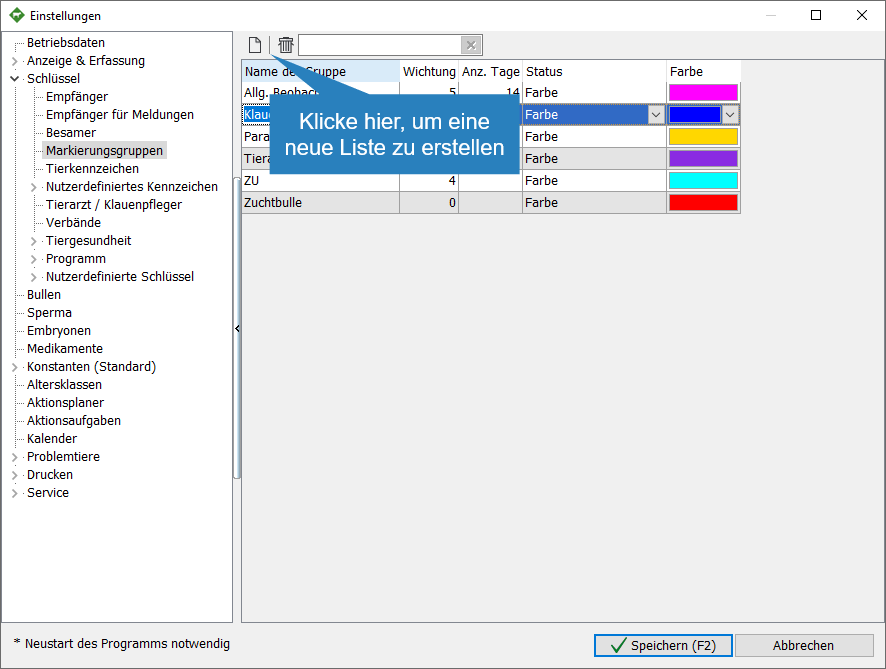
- Click
 New (Insert) to create a new tag group
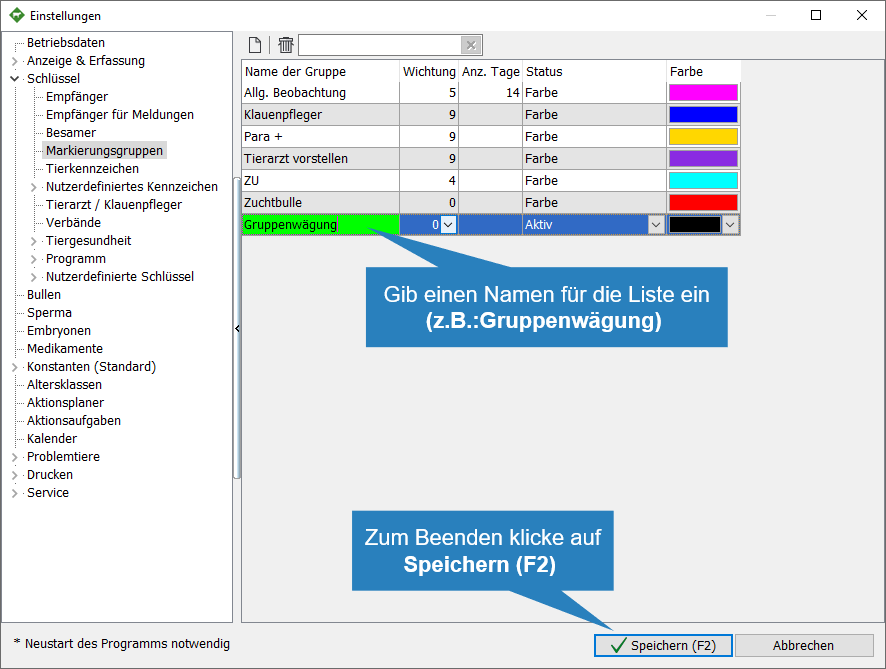
- Enter a label for the list
- To exit, click
 Save
Save 
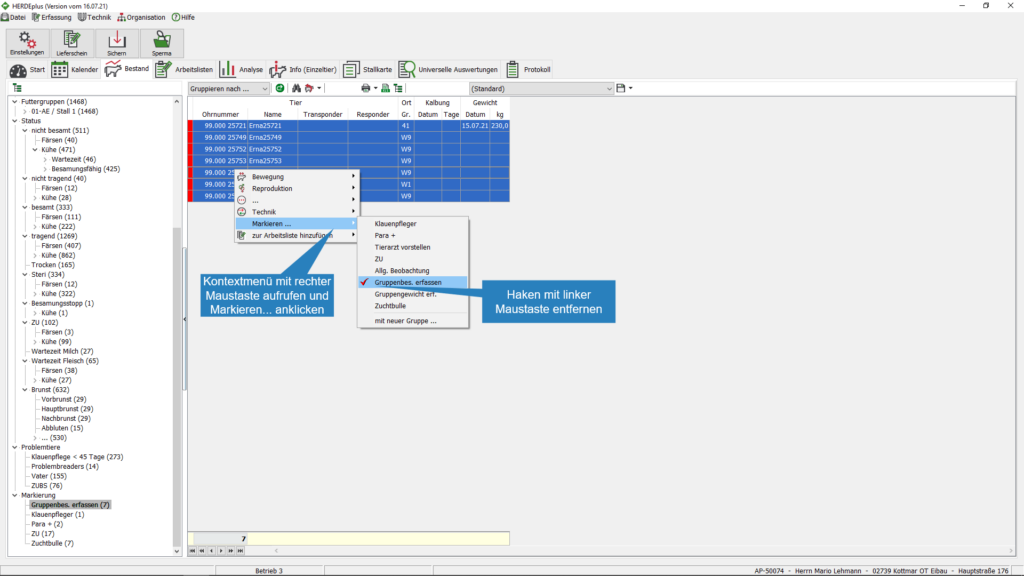
2. Include animals in a marking group
- Open a list of animals (example: stock)
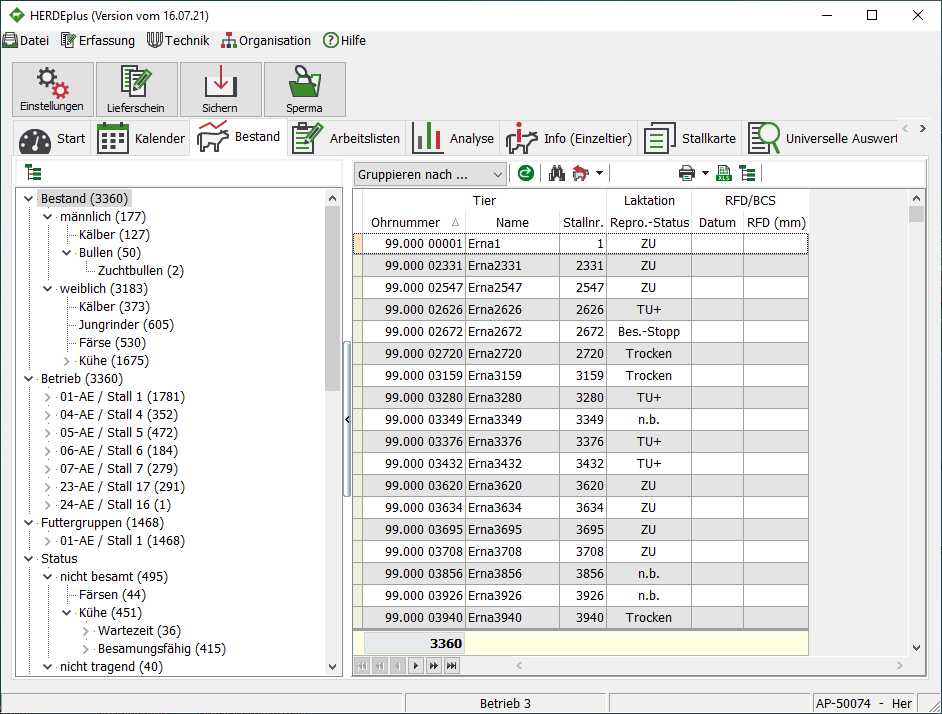
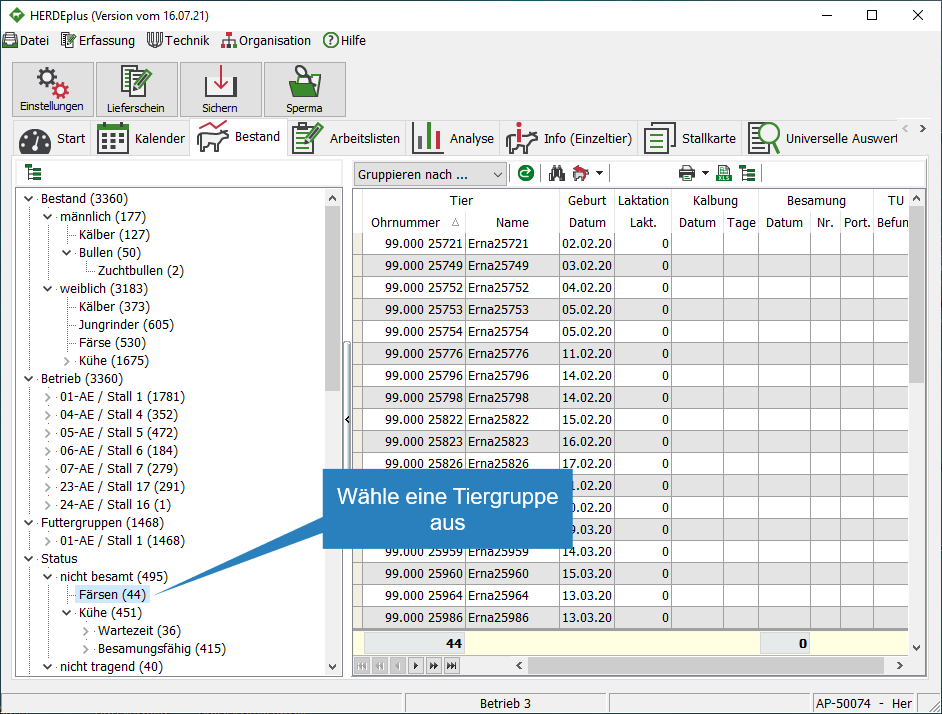
- Select an animal group
- Mark animals with CTRL key and left mouse click mouse or the entire selection with CTRL + A

- Open the context menu by right-clicking on the selection, select Mark and click on the desired list
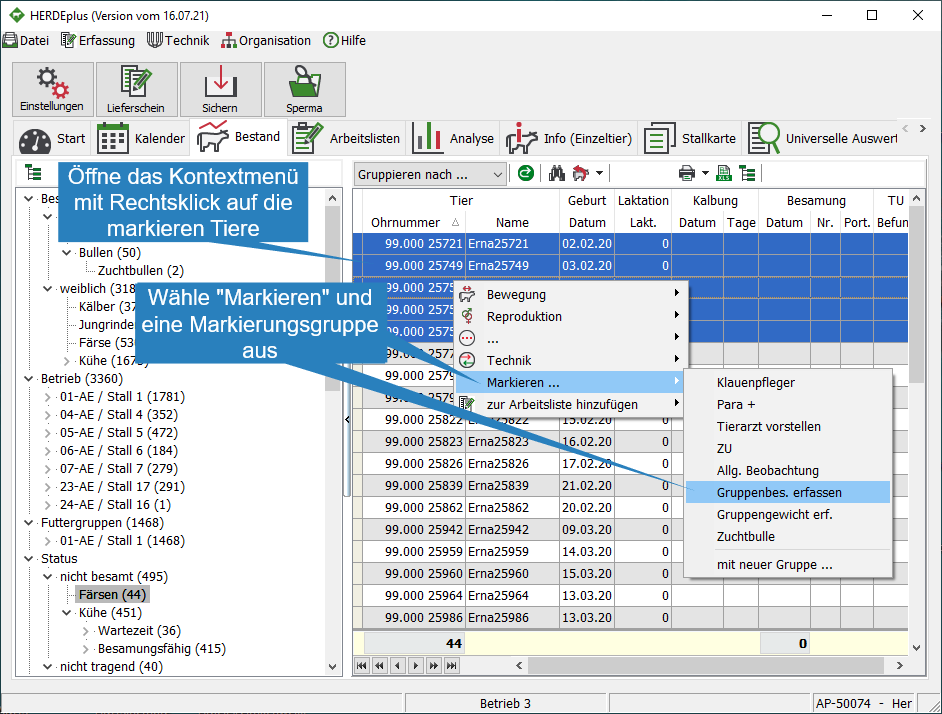
- if a color is defined for the list it appears on the left side of the row

3. Unmark groups
- To remove animals from a marking group, there are two options
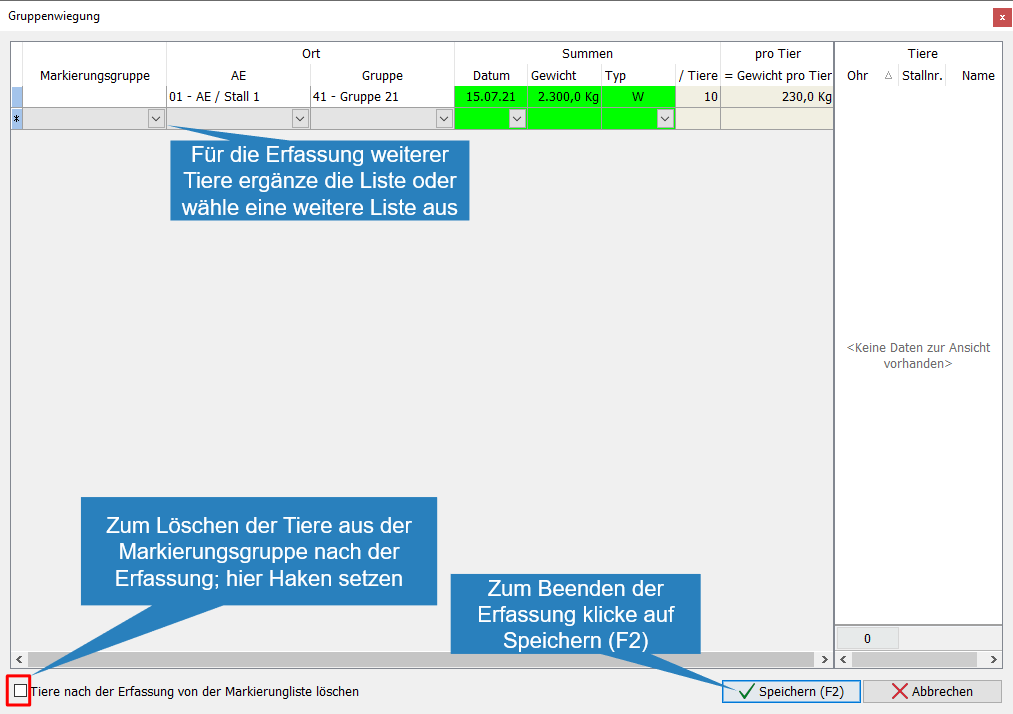
- Remove the selected animals from the list after saving the capture by setting the capturewindow
- Manually delete the selection
- Remove the selected animals from the list after saving the capture by setting the
3. Manually remove animals from a marking group
- Open
 Stock
Stock - Click the Mark list at the bottom of the directory tree from which you want to remove animals
- Mark the animals to be deleted with CTRL + A


- Open the context menu by right-clicking on the selected animals
- Open the “Mark” drop-down box
- Remove the red check mark by clicking with the left mouse button, the animals are now deleted from the marking list, new animals can be added to the list immediately